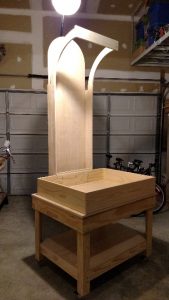
 A year ago we saw a video that showed a sandbox that was able to show a topographic map showing contour lines displayed from a projector, to a computer, to a Kinect camera. I thought I would share a little information on what Fredericksburg did to get that video to become a reality.
This all happened before the AR Sandbox became very popular (now you can purchase them online), so we enlisted help from folks around our school. Our former Director of Technology is a Master Craftsman, and while information was online on how to build it, he did a much sturdier version of the suggested specifications. It took about two months for the build to occur.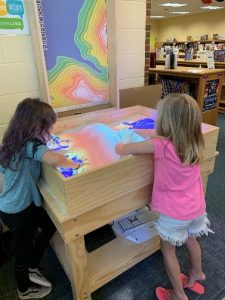
In the meantime, we began to investigate computers and projectors that would support the specifications. In the end we settled with an Epson VS250 projector, and a Trident MS-B920 desktop with a GPU (Nvidia GTX 1060, DDR5 3GB). We would recommend however going with the BenQ short throw projector that they recommend, we thought the above-mentioned projector would be a little better, hindsight we should have stuck with their model.
Setting up the computer was straightforward; you need to only have a bit of knowledge of Linux to utilize the software. Having the online Linux community was very helpful. I will tell you from my experience now setting up 3 desktops with the Linux Mint version 18.3 Sylvia (MATE) was the best version. I know currently they are using 19.1. We had an issue with 19.1 and the graphics card not being recognized, so after many hours of backtracking, I went back to the 18.3 version and had success with the graphics card being recognized.
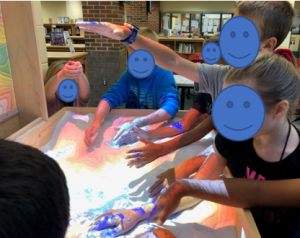 So why do this and what was the benefit and goal of using this AR Sandbox? First, to us it is all about students. This gives students a unique opportunity to explore hands on learning at its finest. Students can manipulate the sand and, in real time, be able to see the landforms change instantly. Students are able to manipulate the landforms to show water running downhill and where it travels based off of the topography, in fact, with the code, students can hold their hands out at cloud level and have it appear as if their hands have water coming down to
 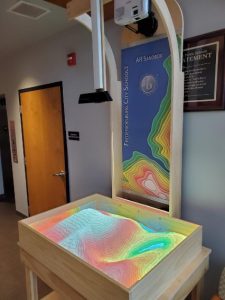 the ground (with the addition of an evaporation command and a water command, students can see the water cycle in action). Being able to change the land in real time allows students to experience what would happen during a tsunami, hurricane, flooding, and storm surges. Talking about it is one thing, watching a video of it is another, being able to immerse yourself in it makes the learning so much more meaningful and in the end that is the goal.
Currently, we have our Sandbox at our Grade 3-5 school, and it is being utilized to teach students about watersheds, the water cycle, plate tectonics, and the impact that weather has on our planet. In addition to students coming down for lessons utilizing the sandbox, students are able to visit the library where it is housed and come in and explore it just as they would be able to at a museum. Teachers and students have reflected and have said what an amazing experience this has been. From my standpoint with it being all about students, I feel that this was an amazing addition to the already wonderful teaching we have going on in Fredericksburg. The photos in this post show the progress of our build and the students getting to use the sandbox during lessons.
The site that we used for the building design ideas, software, and hardware installation was from UC Davis. If you are interested in creating your own, use the information on their site. I know that it helped us out a lot. If you have questions or are interested in learning more, feel free to e-mail me and I would be happy to answer your questions.
Written by Josh Long. Josh is the Director of Technology for Fredericksburg City Schools and a member of the VSTE Board of Directors.

