• Skip to main content

VSTE

Virginia Society for Technology in Education

  • About
    • About VSTE
    • Committees
      • Advocacy
      • Awards
      • Education
      • Elections
      • Equity & Diversity
      • Finance
      • Outreach
    • Get Involved
    • Leadership
    • VSTE Corporate Council
  • Blog
  • Events
    • VSTE Calendar
    • Annual Conference
    • Annual Conference Archives
    • The Leading Ed Forum 2025
    • Power of Coaching 2025
    • Corporate and Conference Sponsorship Opportunities
  • Prof. Services
  • VCC
  • #VSTE25
  • Membership
    • Subscribe/Join
  • Contact
  • Facebook
  • Twitter
  • LinkedIn
  • YouTube
  • Search

VSTE Voices

Getting the Most Out of Your Raspberry Pi in the Classroom

December 11, 2017 by vsteadmin

This is a cross post from the DexterEd website and features content of potential interest to VSTE members.

So you purchased a Raspberry Pi!  Now what can you do with it in your classroom?  These simple $40 computers are extremely versatile in the classroom. Whether you have one or a full set, there are plenty of ways to utilize them with your students.  Time for a field trip to my 6th grade classroom!  We have eleven Raspberry Pi workstations setup in my classroom for the students to use throughout the day.  They are used just like our class laptops – web searches, creating documents and slideshows, etc.  We also use them to learn more about physical computing, programming, and to build.  This has been a work in progress over the past three years.  I started with one Pi and it has slowly grown from there. Below are a couple of ways to use the Raspberry Pi in your classroom.

Computers

Using the Raspberry Pi just like we use other computers takes a little setup. The Raspberry Pi is the computer board, so you’ll connect it to a mouse, keyboard, monitor, and ethernet cable to turn it into a computer.

Programming

Many students begin programming using block-based programming languages such as Scratch.  Students can create programs for a variety of purposes.  In my class students have created quiz games, reviews to illustrate concepts in a unit, as well as programs just for fun. Students can also program in other languages such as Python.  Sonic Pi is another program for programming that is designed for creating music and sounds. The Raspberry Pi Foundation has excellent activities and lessons to help you get started.

  • Scratch Lessons
  • Python Lessons
  • Sonic Pi

Physical Computing

Students can learn to control LEDs, buttons, distance sensors, motors, buzzers, and robots.  This can be through class lessons or individual explorations of using the GPIO pins on the Raspberry Pi to control inputs or outputs.

  • GoPiGo, a complete robot kit you can program in Bloxter, Python, Scratch, C and more.
  • GoBoxEd, a set of curriculum to teach programming in a block based language, Bloxter (built off of Google’s Blockly).

There are also a variety of HATs for the Raspberry Pi and Raspberry Pi Zero.  Another way to explore physical computing with Pi is by using a Sense HAT.  The Sense HAT features include a barometer, temperature sensor, humidity sensor, gyroscope, magnetometer, LED matrix display, and a button joystick. The Raspberry Pi Foundation has excellent activities and lessons to help you get started.

  • Scratch
  • Python
  • Sense HAT

Building –

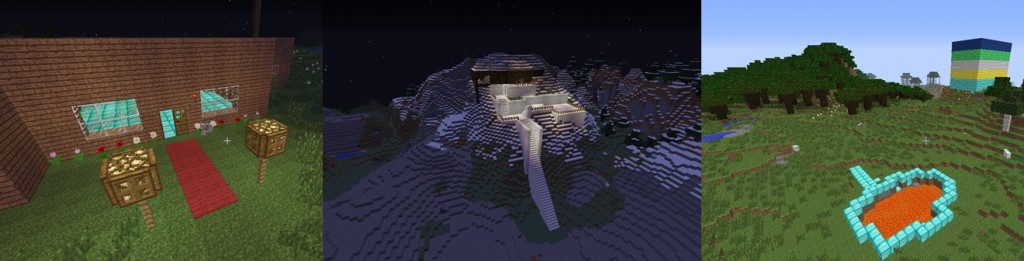
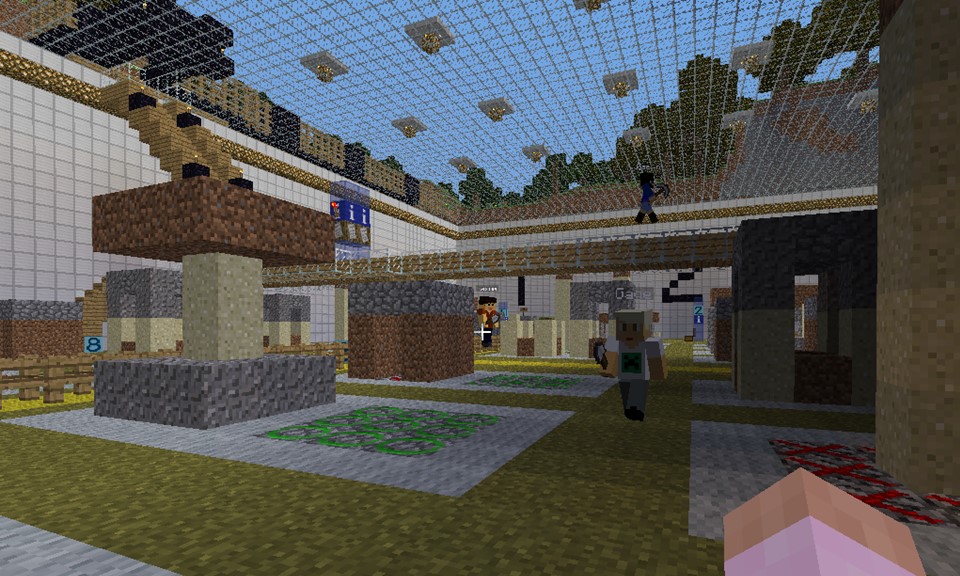
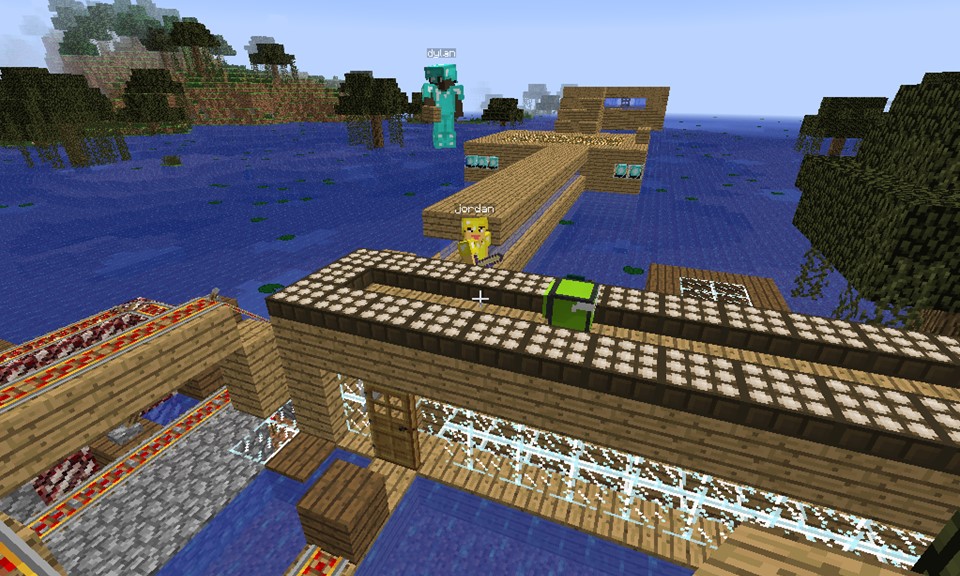
Minecraft Pi is a basic version of Minecraft made for Raspberry Pi.  Students created builds to show their understanding of social studies concepts, illustrate types of patterns in math class, and to explain novels from book club.

Not only can students build in the Minecraft world just as they do in other versions of Minecraft, they can learn Python programming to build.  This was a  lunch bunch project for a group of my students last year.  They read and learned about programming in Python to create structures in Minecraft, teleport, and much more. Their exposure to Python through Minecraft then inspired them to investigate using Python to program games and to control their robots.  If you need to some support getting started, check out the Raspberry Pi Foundation site.

There is so much you can do with the Raspberry Pi and this post just scratches the surface of the possibilities.  Hopefully you are inspired to dive in and learn more!

Sign up to receive a FREE Raspberry Pi Syllabus!

Share this:

  • Click to email a link to a friend (Opens in new window) Email
  • Tweet

Filed Under: Front Page Middle, VSTE News, VSTE Voices Tagged With: VSTE Voices

How to Get Funding for STEM and Robots from the PTA/PTO

November 19, 2017 by vsteadmin

This is a cross post from the DexterEd website and features content of potential interest to VSTE members.

You know what you want… now, prep and work with your PTO/PTA to make it happen.

I primarily work with educators at Dexter Industries to help them figure out what they need for their classrooms and assist in getting them started with their robots kits. Outside of my Dexter work though, I’m very involved in my children’s school, having started my 4th year being on the Parent Teacher Organization (PTO) board. PTOs and PTAs are such an integral part of schools. They don’t just organize parties and events. They offer another avenue for teachers to request new technologies for their classrooms. Teachers sometimes aren’t aware that their PTO or PTA could actually help them when there are items or curriculum they want or need for the classroom.

PTOs and PTAs are different entities with different rules, but when it comes to helping teachers purchase new technologies for students there are similar ways for the PTO/PTA to say “Yes” to the request. Many times there are grade level funds set aside for each grade. The amount of these funds vary and could range from $100 to more than $500.

At the same time, the principal often receives a fund from the PTO/PTA that could be used for new school technology. Some principal funds are solely used for events, assemblies and other things that benefit the school and all students as a whole, but this varies per principal so requesting funding through the principal funds may be an option for you. With this in mind, if the technologies wanted are to be used in a library Makerspace, Computer lab, or mobile robot lab, then a request to the principal would be very appropriate.

Teachers are also welcomed to just request funds from their PTO/PTA for items they want, and see if a line item could be added to the PTO/PTA budget for the year. The most common way, however, that PTO/PTAs can help educators get new technology is through a dedicated fundraiser for the items teachers want. 

Let’s say you want to introduce robotics to your classroom, lunchtime club, after school program, or in the computer lab/library/makerspace. There are specific steps you should take when requesting that your PTO/PTA develop a fundraiser for the purchase of the robots you want.

As an educator these are the things to consider when pitching to the PTO/PTA:

At Dexter, we’ve built a presentation that covers all these areas for you, check it out here.

  1. Know the robotics kit you want and have bullet points as to why you want it. Make note of which grades it will be used with and how often. Dexter Industries recommends one robot per two to three students. Know how much money it will cost for everything you want- robots, curriculum or course units, any extra sensors or software. You may need additional equipment if you don’t already have it, like batteries, chargers, iPads. Robots are most often programmed via computers, including Chromebooks, and/or iPads.
  2. If possible, be able to share which state standards or course concepts the work you want to do with the robot will meet. For example, Dexter Industries course units and curriculum list all of the state standards that are met when using the kits and projects. We are continually developing new projects and lessons to expand our curriculum offerings.
  3. Know how the robot kits you want will benefit your students. Are the kits going to inspire and be accessible to all types of learners maybe? Are the robots going to create a renewed enthusiasm in an area where students seem bored and test results have dipped? Are you enthusiastic about the GoPiGo (shameless plug) because you can help your students learn to program in real world languages like Bloxter and Scratch, and then move into Python and Java? This is the “sell” part that you want to develop. You should figure out “why and how” the technology would benefit the students. Remember, the PTO/PTA board that you’re asking money from has students at your school. Have a few key points as to how the robots will benefit all students. You can also check out our Lesson Snapshots Guidebook showing you how to integrate robots into different content areas.  
  4. Have an example of the technology, in this case, the robot, to show your PTO/PTA board and principal. Request to be on our PTO/PTA meeting agenda so you can present and show off the robot at one of the general meetings. Show the ease of the software interface and a quick example program that makes the robot move. Have it drive and deliver a sweet treat to where the PTO/PTA board is sitting perhaps. Some robotics companies, like Dexter Industries, offer loaner programs (check out our free 45-day teacher trial) which makes it possible to evaluate the robot and bring it to meetings with your PTO/PTA or other administration who need to give a green light. Be prepared for questions from the PTO/PTA board member and the principal. If you need administrative buy-in first, set up a time with the principal and show off the physical robot, and let him/her know what funding sources you are planning.

PTO/PTAs do a lot for schools and are a great independent resource of the school to request funds for ideas that teachers have. Over the years I’ve been on the board, I’ve seen requests range from iPads and poster makers to sending librarians to conferences. Remember, PTO/PTAs want to help teachers make the school the best place possible for you and the students. They often have funds available or can assist in raising funds to support your efforts. Know what you want, show the technology in person if you can, and simply ask. It all starts there.

By Elizabeth Kiken

Download our free presentation and sample budget proposal to get you started. 

Share this:

  • Click to email a link to a friend (Opens in new window) Email
  • Tweet

Filed Under: Front Page Middle, VSTE Voices Tagged With: VSTE Voices

How To Get Started With Robotics in the Classroom

October 29, 2017 by vsteadmin

This is a cross post from the DexterEd website and features content of potential interest to VSTE members.

Back to school! Back to school! This is a time of new beginnings, fresh starts, and a whole lot of chaos.

by Lisa Rode, 6th Grade Classroom Teacher in Fairfax County, VA

In all this madness, how do you add anything more? If you are not familiar with programming and robotics, adding “just one more thing” can be a bit intimidating, especially at this time of the year. But, it doesn’t need to be difficult.

Just a bit about my story — I had never programmed a robot before and had very little experience with Scratch or any other programming language. I decided to try something new in my classroom and purchased one robot to build and tinker with alongside my students. I asked my class for a few volunteers to join me at lunch to build and learn about the robot. Three students volunteered to come during their lunch period and we learned alongside one another.  More and more students became interested in programming this class robot.

Through the support of my school community, I was awarded a grant through the Farmer’s Thank A Million Teachers grant contest.  We were able to purchase more robots and sensors.  They were initially going to be used during an after school program, however over the past three years I have integrated using them in my core content lessons as well as lunch time student-led programming, and an after school club. The students also figure out ways to integrate them into class lessons on their own.

For example, students were given the task of create a Rube Goldberg machine to show energy transformations.  I showed them a variety of examples and said they could use anything in our class makerspace to build it.  The majority of the materials in our makerspace are recyclables and craft materials.  Students immediately found ways to incorporate the class robots into their machines.  One group even had a robot drive forward to push a button on a keyboard to move a character in Minecraft Pi into a photobooth and take a class selfie.  What?!?! I thought they were going to just use cardboard and tape for their machines. It was awesome.  This has been a great adventure and I can’t wait to see where it leads.

BUT… I Don’t Have Enough TIME for Anything Else!!!

Simply put, it is worth the time.  Time is always at a premium in the classroom.  I have found that the use of hands-on activities and project-based learning engages students and leads to a deeper understanding of the concepts. Integrate the use of robotics into core curriculum when possible.  Writing is one of the simplest ways to do this. Students can do something as simple as journal to record and reflect on their project or assignment.

BUT… I Don’t Know Anything About Robots and Programming!

It is almost impossible to keep up to date with all of the new technology, apps, and software. There always seems be something new and different. We need to be flexible and open to learning new things, sometimes right alongside our students.  This can also empower students to take more responsibility for their learning and increase investment. We are not necessarily going to have everything mastered when it comes to tech since it is always evolving. This can be a bit uncomfortable. Sometimes it is difficult for teachers to admit that they do not have all of the answers.  But, that can actually turn into the best thing as you encourage the students to “figure it out together!”

You don’t have to do it all at once. I started out with a few robots and slowly added as I found more and more ways to use them in my classroom.

BUT… No One Else At My School is Doing Robotics

Every teacher is different. Every student is different. Think about it, “A movement starts with a lone nut.”  Be that lone nut.  Start a movement and followers will find you.  Even if you are the only one at first, others will become interested once they see the students working hands-on and how excited they are. Invite

teachers to see your students engaged in lessons utilizing the robots and encourage them to work with the robots themselves. The beginning of everything starts with someone introducing it to their school and students. Robotics is included in this and the more others see students learning through their robots, the more others will want to participate.


Here are some guiding questions to help you get started:

Where Do I Begin?

Determine your objective for the robots

  • What are you going to use them to teach? (Download my Robot Lessons Snapshot Guidebook showing ways I’ve integrated robots into different areas like language arts, math and science)
  • Will they be used in multiple subject areas?
  • Will they be used for multiple grade levels?
  • Will they be used for competition?

Determine the necessary hardware

  • What types of robots and other hardware are needed?
  • What robot/kit best meets your objective?
    • What age group are you planning for?
    • What prior experience do the students have programming and building?
    • What kit best meets your budgetary constraints?
    • How durable do the robots need to be?
    • Will they be used inside or outside?
    • How much time is available? Will the class have time to build the robots or do they need to be preassembled?
  • Are there any logistical considerations?
    • Do you need laptops, wifi, tablets? Do you need to have specific programs or apps installed?
    • Where will they be stored and who will have access to them?
  • What (if any) prerequisite knowledge needed (for the students and/or teachers)?
  • If they are being used for competition, what are the hardware requirements or rules?

Check out the robot comparison chart that the Dexter Industries team started. We’d love your feedback and input about what you think of this comparison. We want to refine it and improve it with input from the community of educators that have used these robots in the classroom, so please share your input and critique of this comparison!

Determine the scope

  • How many robots will be needed?  Groups of 2-4 students per robot work well. The smaller the group, the better.
  • Will they be used in the classroom as well as after school?  Only after school?

Determine the necessary budget and gain funding

  • Request school funds from your school administration
  • Request funding from your school PTA (Sample Presentation)
  • Grants
    • Stemfinity: STEM Funding Opportunities
    • GrantsAlert
    • National Science Foundation
    • Farmer’s Insurance Thank America’s Teachers (This is how I got the bulk of my initial funding.)
    • GetEdFunding
  • Crowdsourcing
    • Adopt A Classroom
    • Donorschoose.org
    • PledgeCents
    • GoFundMe

Although there is a lot to consider, take the time to think through the questions and pick out a kit that works for you and jump in.  Even if you decide to start small like I did, encourage you to take the chance and try something new this year.

Please don’t hesitate to reach out to me if you want to discuss with a fellow teacher!


Share this:

  • Click to email a link to a friend (Opens in new window) Email
  • Tweet

Filed Under: Front Page Middle, VSTE Voices Tagged With: Robotics

Finding Your Next Big Idea at VSTE 2017

October 18, 2017 by timstahmer

While we hope everyone leaves the VSTE Conference with many new ideas to improve your professional practice, the best is always that one big "aha" that you can turn around and use immediately.

In this post, VSTE member Tracey Zaval talks about the great idea she brought back to her classroom from VSTE 2016.

------------

Last year I attended the VSTE conference for the first time. Not only was I looking forward to attending the conference as a presenter, I was also looking forward to the conference as an attendee. As I veteran teacher of 19 years, I know the mark of a great conference is one where you instantly get excited about something you learn and you can’t wait to get back into the classroom to try it out with your students, and I had high hopes for the VSTE conference. Well, let me tell you, that conference last year was a GREAT one!Photo of students working on a Breakout E D U project

One of the first sessions I attended was a “pop-up” session in the hall of the convention center. The one I attended taught participants about digital breakouts, a computer version of the very-popular escape room concept that require students to work collaboratively and think critically. I had never heard of digital breakouts but within 20 minutes of the presentation, I was excited and I was hooked. I couldn’t wait for the session to be over so I could start looking around the digital breakout site for myself to see how I could adapt their ready-made breakouts for my class.

As soon as the session was over, I found an empty table to sit at as I checked out the available resources on the digital breakout site. I very quickly decided I would need to create my own digital breakout in order to support my students’ learning, so I got right to work. There are a series of videos on that site that teach people how to make their own digital breakout - everything from how to build a google site, how to embed secret clues, and how to create a google form to house all the digital locks. I pretty much spent the next two days of the conference working on my digital breakout in between sessions until I had a finished product.

Photo of students working on a Breakout E D U project.I debuted my first digital breakout, “It’s a Wrap”, in my classroom right before the winter holiday break. The premise of the breakout was to breakout out of the town that ran out of gift-wrapping paper and make it to the town of Wrappinville to buy more. My students had such a great time participating in this activity, they asked right away if they could do another one. At that point, I had already begun working on my next one, a content-related breakout involving James Madison as he was writing the U. S. Constitution. My students were so excited, three weeks later, when they got an attempt to break James Madison out of his office to help him find where he put his draft of the Constitution.

Since the conference, I have created three additional digital breakouts and each time I use one in class, my students’ excitement and engagement goes through the roof. I am so thankful I attended the VSTE conference last year. If there is anyone who is looking for a great conference to attend to enhance the use of technology in their classroom, the VSTE conference is exactly what you are looking for!

Tracy is an 8th grade civics teacher at Midlothian Middle School. Photos are of her students at work on their Breakout EDU.

Join us at VSTE 2017, December 3-5 at the Hotel Roanoke to discover your next big idea. Due to the size of the convention center, space is very limited and is filling fast. Register now!

Share this:

  • Click to email a link to a friend (Opens in new window) Email
  • Tweet

Filed Under: Blog, Events, Live Events, VSTE Voices, vste2017

VSTE Voices: Minecraft and Media Literacy

October 2, 2017 by vsteadmin

MInecraft and Media Literacy Header

VE PLN Member Beth O'Connell describes a Minecraft lesson plan she developed and taught around the concept of media literacy.

Cross Posted from Beth's blog

I’ve been working on getting Minecraft into our school for about a year now, ever since I discovered for myself how (surprisingly) immersive and thought-provoking it can be. When our school system got a grant for a school calendar study which resulted in a twice-yearly Intersession week between quarters, the opportunity arose. I used Knowclue Kidd’s (Marianne Malmstrom) idea for real estate ads in Minecraft to teach some media literacy concepts. The kids had a blast playing, and even learned a little about how advertising techniques are used.

Once the new calendar was approved, the teachers and staff members were given one hour to come up with a plan for their intersession class. Each of us would be teaching a half-day class for five days. We had to provide fun activities that linked to our state standards. In just that short period of time, we came up with some amazing ideas! This was my submission:

—————————————————————————————————

Intersession Title: Minecraft and Media Literacy

Grade Level: 7

Content(s) and Standard(s):

7.3 The student will understand the elements of media literacy. a) Identify persuasive/informative techniques used in nonprint media including television, radio, video, and Internet. b) Distinguish between fact and opinion, and between evidence and inference. c) Describe how word choice and visual images convey a viewpoint. d) Compare and contrast the techniques in auditory, visual, and written media messages. e) Craft and publish audience-specific media messages

Brief Description:

After learning about persuasive techniques in the media, students will build a house in Minecraft and create a video advertisement with machinima.

Are you tired of being manipulated by advertisers? Learn their tactics! Students will build a house in Minecraft and market it with a machinima real estate ad.

Detailed List of Materials Needed:

  • MinecraftEdu server and 25-30 licences (https://minecraftedu.com/purchase)

—————————————————————————————————

Getting MinecraftEdu installed and working felt like swimming upstream against a strong current. Our IT department was very willing and supportive, but had a lot of competing demands on their time. Eventually we hope to have MinecraftEdu hosted on a district server, but for this project I ran the server on my school-issued laptop. We used a 30-workstation computer lab, which I spent several hours configuring so the server IP address was already added when the students started the software. (The IT department set a fixed IP address for my laptop.)

We’re using the Canvas LMS (learning management system) this year in our district, so I spent some time creating a course with assignments and resources for this class. My class was scheduled for the last half of the school day, so I spent each morning getting ready for the class. For the first session, the students wrote a bulletin board post introducing themselves, and took a Minecraft Experience survey (created with Google Forms). At the beginning of the 3rd, 4th, and 5th days, they wrote a guided reflection piece, and they took another survey at the end of the class. Nothing was graded, but most of the students did a good job completing the assignments (despite some grumbling about having to wait to play.)

MInecraft and Media Literacy Canvas

We jumped right in at the beginning of the first day doing the MinecraftEdu Orientation. This build offers a lot for all levels, getting the completely inexperienced users started, and providing puzzles for the experienced players to figure out. The students were required to use their own real names, with no gamertags or numbers.

MinecraftEdu Orientation

After we played for an hour or so, I stopped them and had them log in to Canvas to do the survey and introduction. I started talking about media literacy by saying: “You’re being tricked! Every day, advertisers try to trick you into spending your money, or getting your parents to spend theirs. Have you noticed how this can happen? How do you feel about this?” The students seemed really unaware of this, in spite of the vast amount of media exposure that most kids have.

The next day I played some real estate ads that I found on YouTube (available on this playlist https://www.youtube.com/playlist?list=PLSn_3qRXdgj1DKid15BFNrHVqfSsFxaWp), asking them to look at some elements of video media  (lighting, editing, sound, language used, what is featured, camera shots). We talked about features of houses, and generated lists of essential, advantageous, and luxury features that they might want to include. I played Knowclue’s machinima of her students’ Minecraft real estate ads to show what we were aiming for. Here’s what Knowclue said via email about her class’s process:

—————————————————————————————————

> I gave my 5th graders 3 class periods to build any single dwelling house they wanted on a single account. Since we are a 1:1 school I allowed kids to use mods as well if they had them on their personal computer. Didn’t feel that piece mattered for this project.
> We spent one class period looking at array of real estate commercials from our town that I had preselected. The commercials represented a range of house types from apartments to higher end homes. Before we watched the commercials we did a quick brainstorm to populate 3 categories:
> What is essential? (bathroom, kitchen, etc)
> What is an advantage? (garage, en suite bathrooms, etc)
> What would be a luxury? (theater, tennis courts, etc)
> Kids generate the list pretty quickly and we use it for a reference when we watch the videos.
> I asked the kids to watch each commercial carefully to identify the language used, the camera shots and what is featured.
> It’s a blast to dissect each commercial – kids pick this up really quickly, without much prompting. They LOVE identifying on the conventions to “sell” – I gave them very little instruction, mostly just prepared to ask questions. Sometimes I would ask them to identify what kinds of word/phrases they used and after kids generated the list, we would rematch the commercial. It’s a really fun class and you can get through quite a few examples after you generate the list of needs to luxury.
> I give them one class to construct the commercials for their house. I let them choose to use video or pictures, most choose pictures as that is pretty much represents the commercials they saw.
> 5 classes – pretty straight forward. Just so you know the 6th grade ran a simultaneous challenge on OpenSim. I met with 6th grade twice a week and gave them 6 periods to build since the learning curve was steeper.

—————————————————————————————————

I had set up a random world in Creative mode for them to use. They were to explore, find somewhere to build, and give me the coordinates. Some students finished their houses that day, while others were still exploring at the end of class. Several students asked if they could work with a partner, and I encouraged this. I was pleased to see some new alliances developing by the end of the week, between students who didn’t know each other previously.

Minecraft Collaboration

The students did reflections at the beginning of each class after that. The next day I showed them how to take screenshots in Minecraft, how to find their screenshots and transfer them to their storage drives, and how to make a machinima with their screenshots in Moviemaker. They followed the directions with varying degrees of completion. I was learning along with them, staying one step ahead.

We did have some trouble with griefing. A few players flew around to other people’s houses throwing eggs, which then hatched into a plague of chickens. A few people’s houses were partially destroyed, and the perpetrators would not come forward. However, the worst destruction was my fault–on the last day I accidentally saved the world as the previous day’s work, losing all of the building they had done that day. ARRGGHH!! The class as a whole was very willing to help each other out. The responses I got from the end-of-course survey showed that the students really enjoyed the class and thought it went well.

I’m not sure how much the students really learned about media literacy. At least now they’re aware that it’s a thing, and that advertisers use techniques to get them and their parents to spend money. We’re having another Intersession in the spring, and I’m thinking of focusing on civics and developing a community. We had trouble with Moviemaker: although the students saved their files, I couldn’t open them up to show them to the class, so we couldn’t do the sharing at the end. Instead, I opened the world in Survival mode (no PvP) so they could play. That was really satisfying, and the inexperienced players had a chance to try it out.

I learned a lot from teaching this course, and getting to know the students better. I would say that they all were successful–they have a new awareness of media, they developed problem-solving abilities, relationships and coping strategies, and they had a great time playing together. The end-of-course survey showed an overwhelmingly positive response. I’m looking forward to working with our students in Minecraft again.

Share this:

  • Click to email a link to a friend (Opens in new window) Email
  • Tweet

Filed Under: Blog, VE PLN, VSTE Voices Tagged With: VE PLN

  • « Go to Previous Page
  • Page 1
  • Interim pages omitted …
  • Page 21
  • Page 22
  • Page 23
  • Page 24
  • Page 25
  • Interim pages omitted …
  • Page 27
  • Go to Next Page »
  • About
  • Blog
  • Events
  • Prof. Services
  • VCC
  • #VSTE25
  • Membership
  • Contact
  • Facebook
  • Twitter
  • LinkedIn
  • YouTube
  • Search

Support

Copyright © 2025 Virginia Society for Technology in Education · Log in